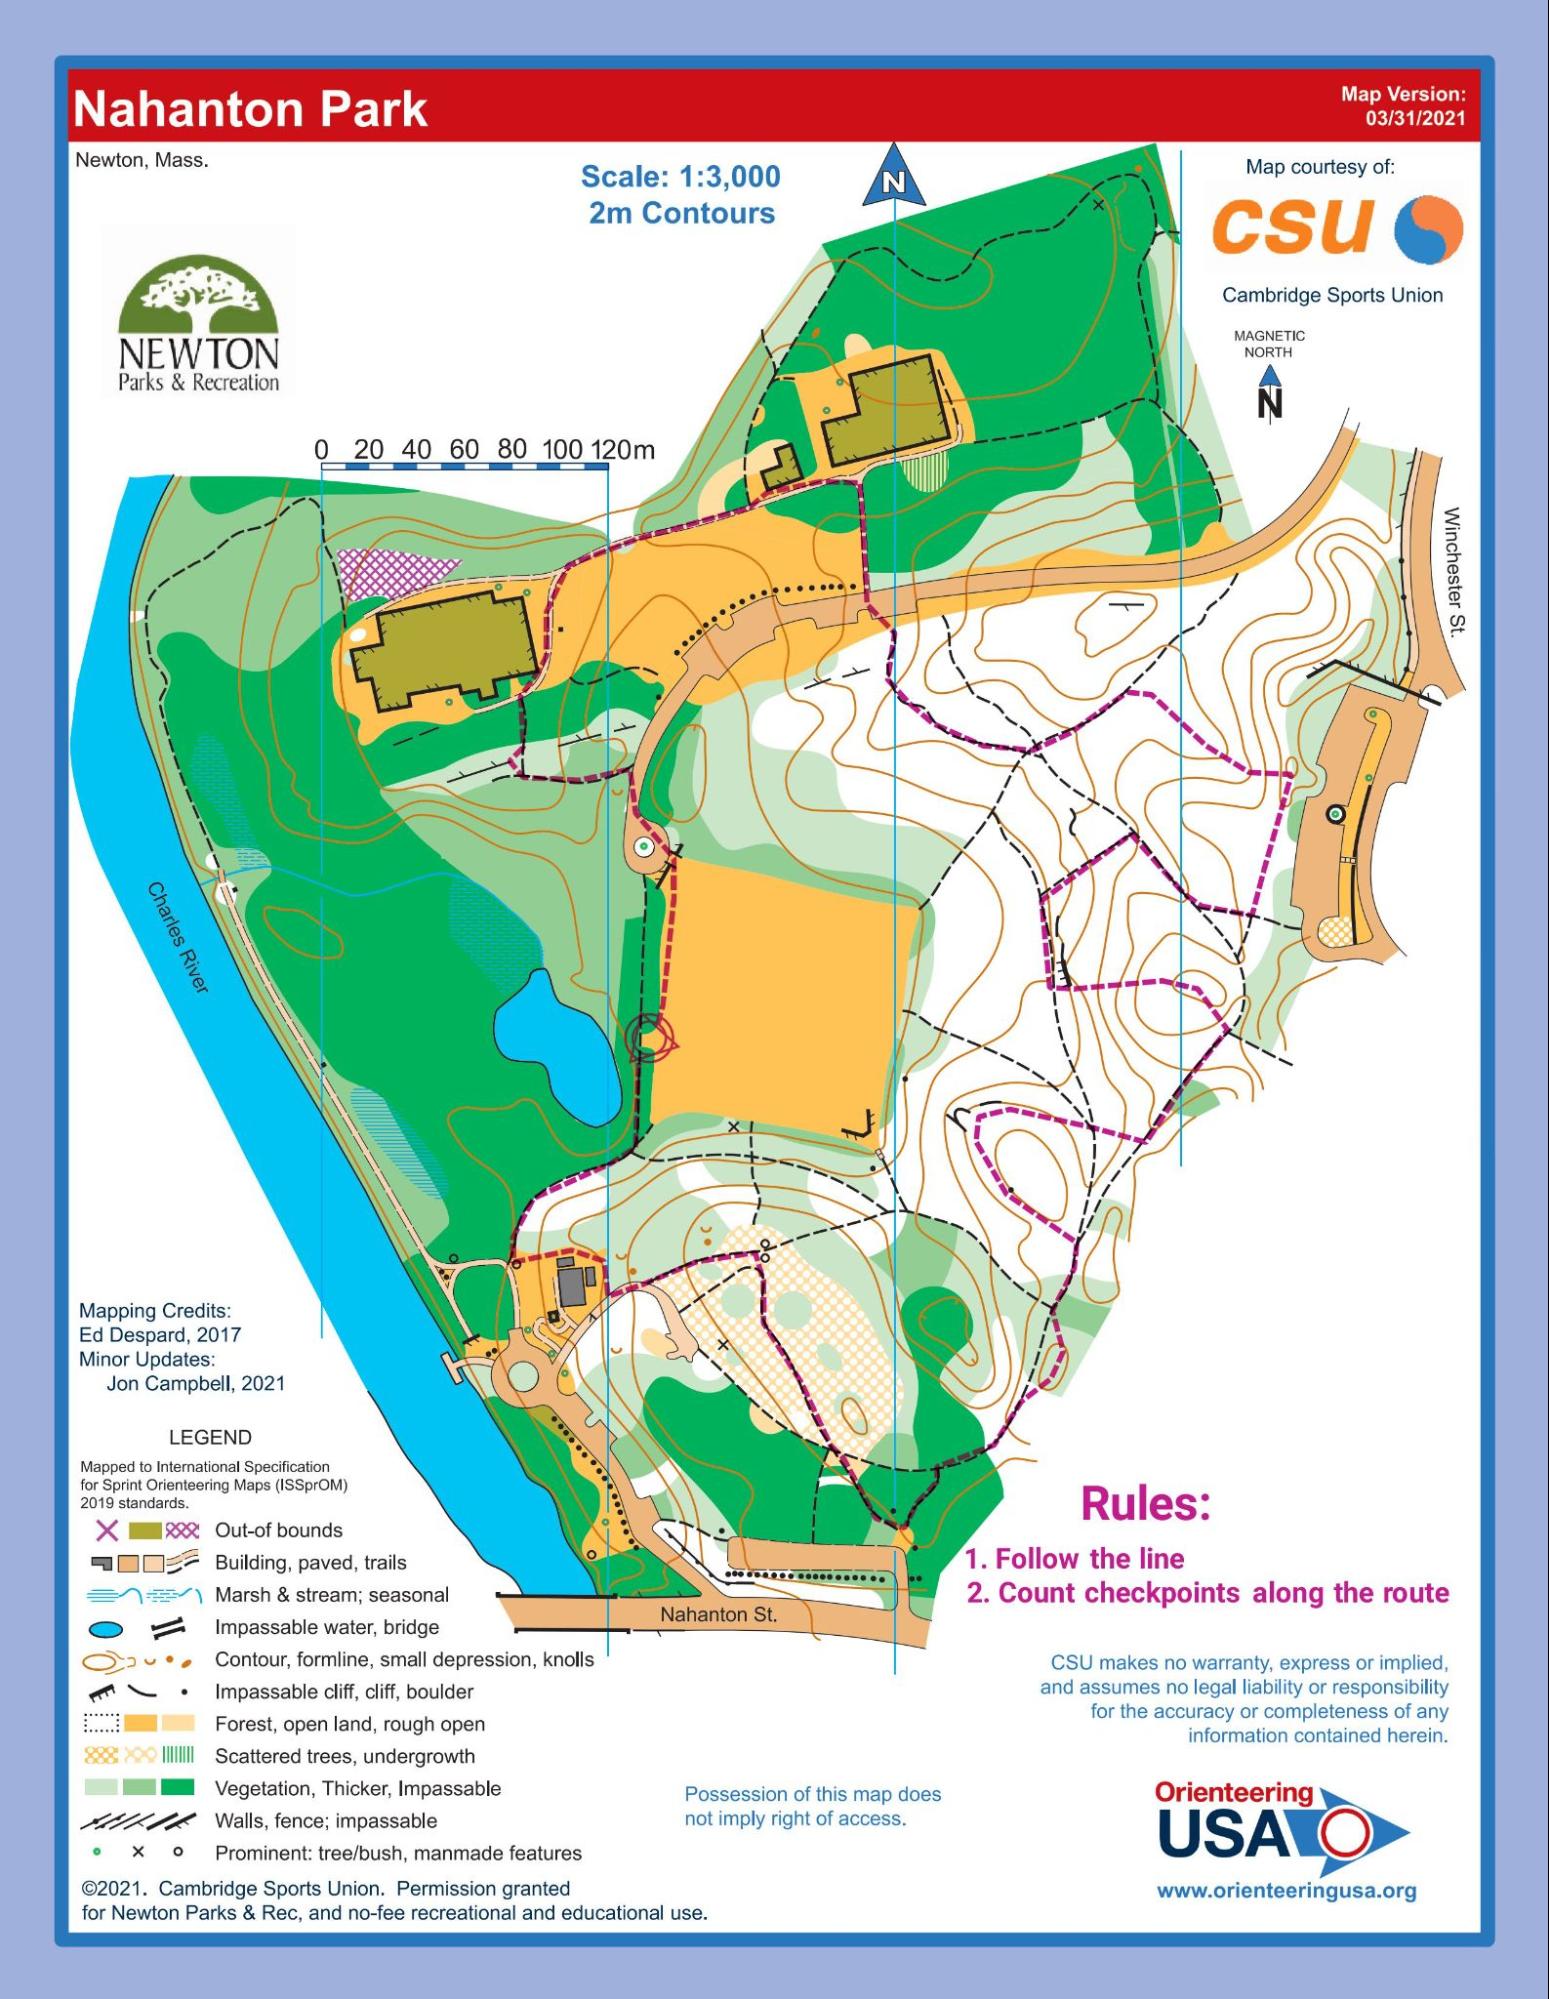
Line-O — Activity
Follow the line and find unmarked checkpoints along the way
| Time | 30-60 minutes |
|---|---|
| Space | Schoolyard, local park, or forested area |
| Materials | Line-O maps (1 per student or pair), All-checkpoints map with checkpoint locations, Checkpoints (flags, flagging tape, or cones), Pens or pencils |
| Vocabulary | Precision, Feature |
"Stay on the line to find the unmarked checkpoints"
- Learning Goals
- How to Run It
- Reflection
- Vocabulary
Learning Goals
Students completing this activity will be able to:
- Develop precision in map reading
- Practise following linear features and fine navigation
- Improve ability to relate terrain to the map
- Learn to describe checkpoint locations accurately
How to Run It
Setup
- Put out checkpoints along the line route as per the all-checkpoints map
Steps
1. Pair up. Have students pair up and look at the map together.
2. Find the start. Find where the drawn line starts on the map and in the terrain.
3. Follow the line. Keep the map oriented as you move. Try to stay exactly on the line. Watch for terrain features that match the map and talk about where you are.
4. Find the checkpoints. Look for unmarked checkpoints placed directly on the line. Remember the location of each checkpoint.
5. Mark the map. Draw the checkpoint locations on your map once you have finished.
Adaptations
Ways to adapt the activity to meet the needs of your students: slow things down, increase the challenge, or adapt for different learners
- Timed: add timing for a competitive version
- Fewer obvious features: make the course harder with fewer obvious features
- Checkpoint count: use more or fewer checkpoint locations
- Solo: do it individually instead of in pairs
Reflection
- How did you make sure you stayed on the line?
- Were there parts where you went off the line? How did you know?
- How would you describe where each checkpoint was located, using the terrain around it?
- What helped you navigate most accurately?