Point-to-Point — Activity (Orienteering Course)
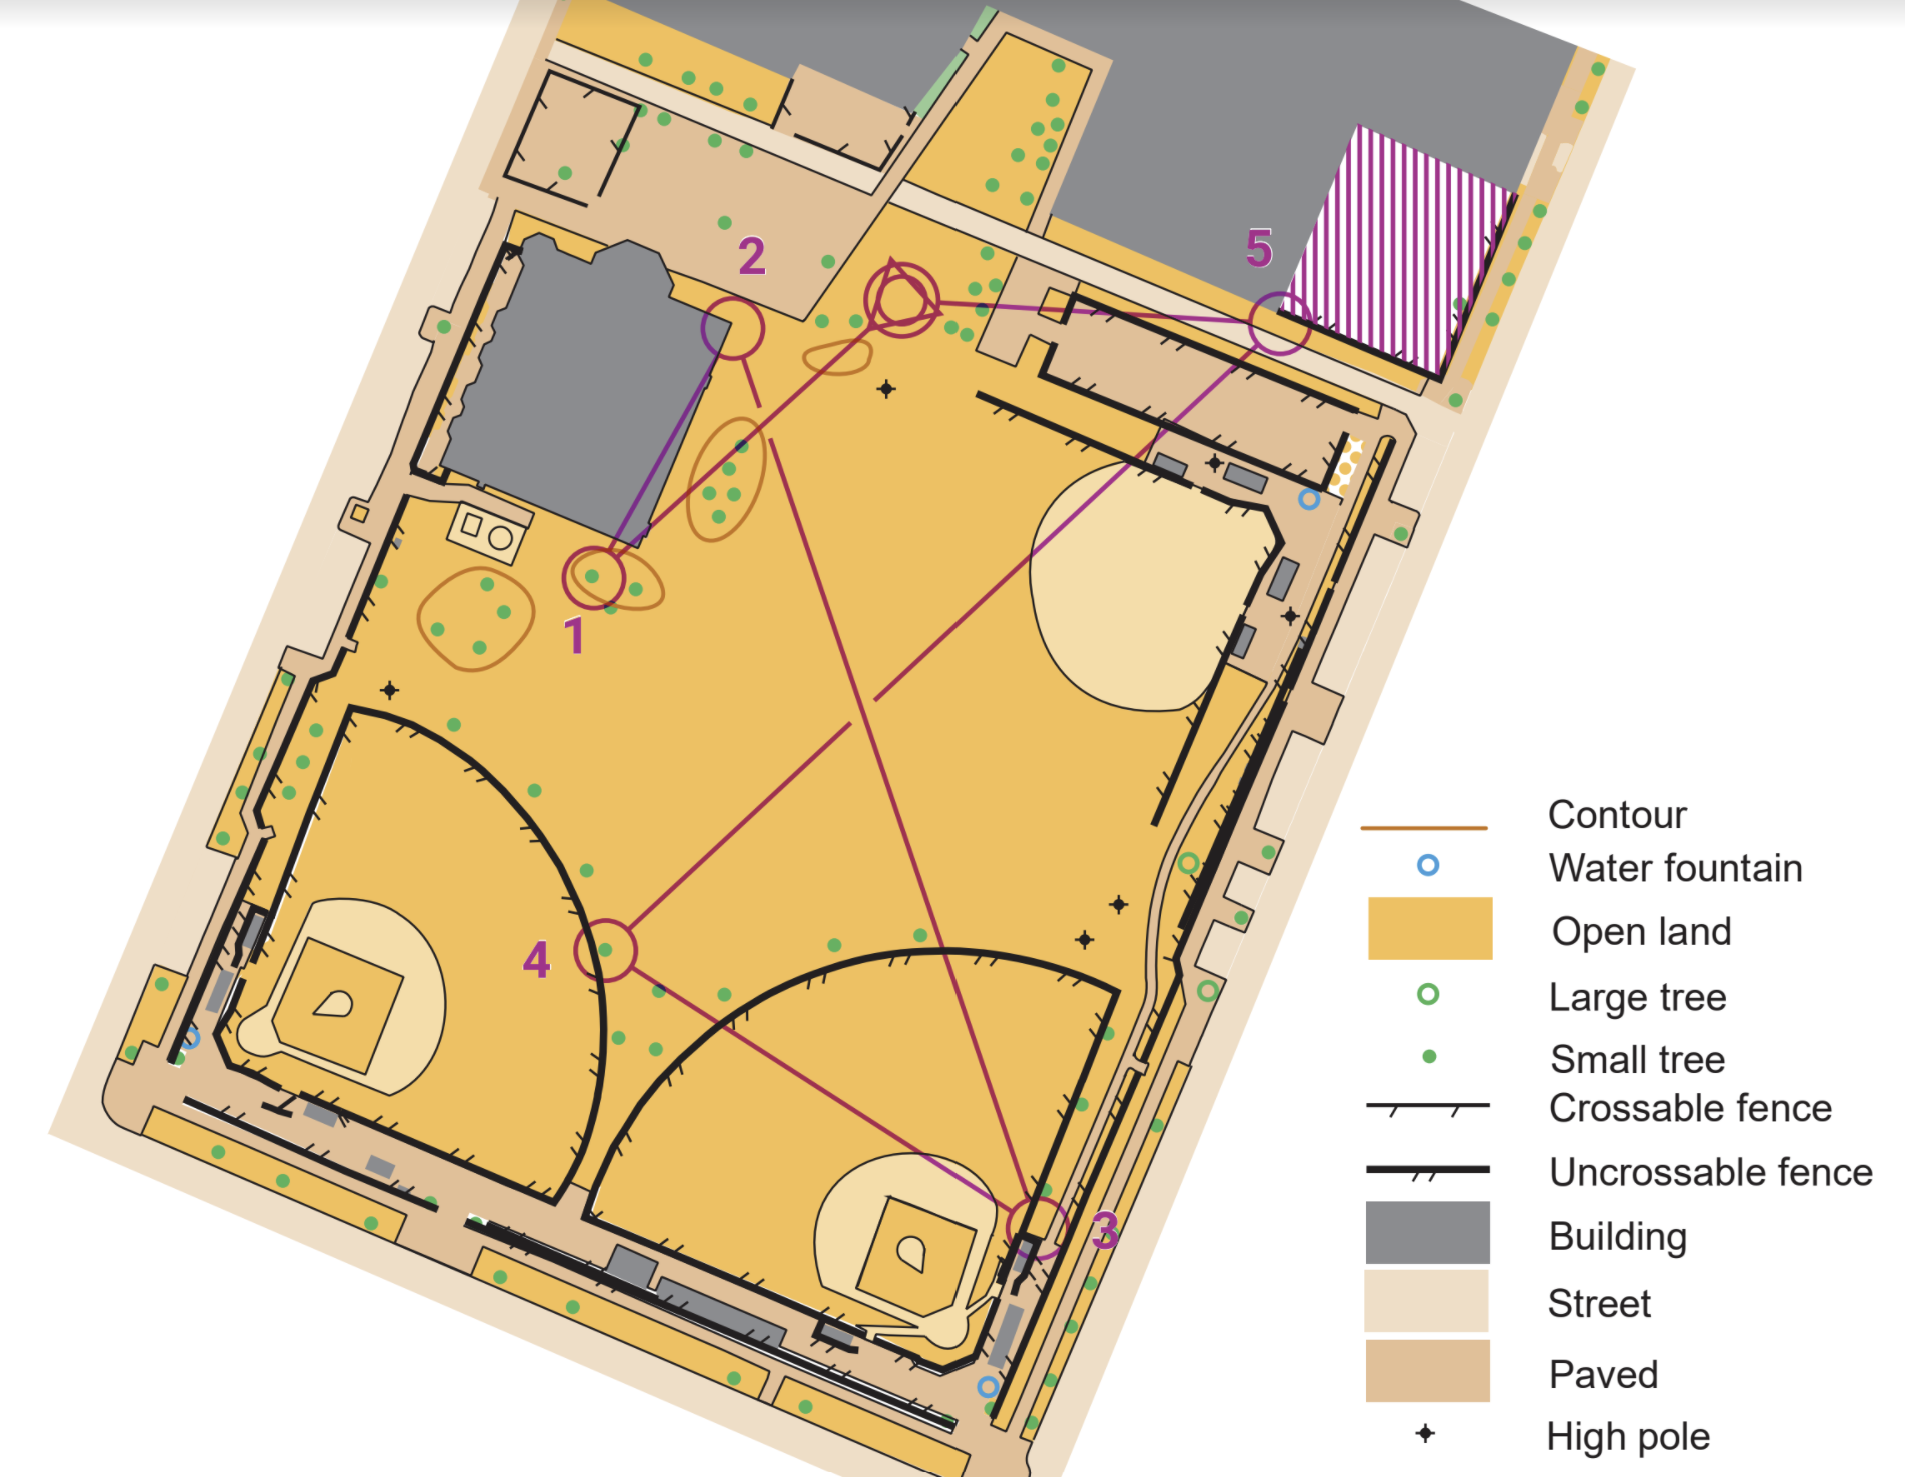
Complete a course using an orienteering map
| Time | 30-60 minutes |
|---|---|
| Space | Schoolyard or local park |
| Materials | Orienteering maps with courses marked, Checkpoint markers (cones or flags) with codes, All-checkpoints map |
| Vocabulary | Orientation, Route choice, Relocation |
"Today we will be doing a regular orienteering course using a map"
- Learning Goals
- How to Run It
- Reflection
- Script
- Vocabulary
- Related Activities
Learning Goals
Students completing this activity will be able to:
- Orient a map and understand how it represents the real course
- Use the map to plan your route to each checkpoint
- Use simple strategies and tactics in following the course
- Move confidently and safely in open spaces
- Work cooperatively with and accept feedback from others
How to Run It
Setup
- Place checkpoints (streamers, cones, or flags) at their corresponding locations on the all-checkpoints map
- Make an answer key for each checkpoint and its code
- Print maps with courses marked. Have multiple courses of varying difficulty if possible
Steps
1. Orient the map together. Hand out maps. Have students orient the map using landmarks:
- "Think of the map as an overhead view of the area, like you are floating in a hot air balloon looking straight down"
- "If something is behind you in real life, turn your map so it is behind you on the map as well"
- Walk around and check that everyone has oriented correctly
2. Connect the map to the environment. Ask students to point to features:
- "Point to where we are standing on the map"
- "If I want to go to checkpoint number 5, which direction should I go?"
- "What feature will checkpoint number 6 be next to?"
3. Explain the course rules.
- Visit checkpoints in order, from number 1 to number 2, from number 2 to number 3
- At each checkpoint, check the code to make sure it matches
- If the code does not match, you are at the wrong place: stop, orient your map, look around, find where you are, and go to the correct checkpoint
4. Plan with a partner. Students pair up, look at the map together, and plan their route to the first checkpoint before moving.
5. Run the course. Students visit checkpoints in order, confirming each code as they go. Remind them: going the right way is more important than going fast.
6. Repeat or try new courses. Students may repeat courses to improve their time, or try harder courses. Students who finish should help others by giving hints, not answers.
Adaptations
Ways to adapt the activity to meet the needs of your students: slow things down, increase the challenge, or adapt for different learners
- Pairs first: start with partner navigation so students can discuss map reading together
- Individual: once students are comfortable, try the course alone
- Reverse order: do the course backward for a new challenge
- From memory: try to reach three checkpoints in order without looking at the map, or try the full Memory-O companion activity
- Harder courses: courses that cross open areas or require more precise map reading
- Relay Race: divide into teams and run a relay format, each runner completing a course before tagging the next (see Related Activities tab)
- Compare routes: after the course, have partners compare route choices between checkpoints and discuss why
Tips
- Keep the first course short (4-5 checkpoints). Students can always do a second course
- Circulate during the activity and ask: "Is your map oriented? Where are you right now? Show me on the map"
- Students who finish early can help others, but should give hints ("Turn your map" or "Follow the path"), not answers
- Emphasize accuracy over speed. Going the right way matters more than going fast
Reflection
- How did you determine which way to go for each checkpoint?
- What shortcuts between checkpoints did you find?
- If you were at a wrong checkpoint, how did you figure out where you needed to go instead?
- How did you feel moving through open areas of the course? Did it get easier?
- How did you and your partner work together and give each other feedback?
- How is Point-to-Point different from Score-O? Which did you prefer?
- What would you do differently next time?
Script
Introducing Point-to-Point
"Today we are doing point-to-point orienteering. This is real orienteering. You will find the checkpoints in the order shown on the map."
"Your challenge is to visit all of the checkpoints marked on the map in order. Remember to keep your map oriented, and use landmarks to help you find your way."
Course Rules
"You will visit the checkpoints in order. From number 1 to number 2, from number 2 to number 3. At each checkpoint, there is a code. Check the code to make sure it matches. If the code does not match, what does that mean?"
(Students: "You are at the wrong place.")
"So what do you do? Stop. Look at your map. Look around you. Make sure your map is oriented. Find where you are on the map. Then go to the correct checkpoint."
Starting
"Find a partner. Look at the map together. Where is the first checkpoint? Which way will you go to get there? Before we start, make a plan. Think first. Then move."
Finishing
(As students complete the course and return.)
"Nice work. Did every code match? If you ended up at a wrong checkpoint, how did you figure out where you were?"
"Compare with your partner or another pair: where did you go between checkpoints 2 and 3? Did you take the same route? There is more than one good route. What made yours work?"
"If you want another challenge, try a harder course, or try this one again and see if you can do it more smoothly."
Vocabulary
Orientation: Turning the map to match up with reality. The map should always match the real world around you.
Route choice: The path you decide to take to get from one checkpoint to the next. Good route choice considers distance, terrain, and landmarks.
Relocation: Figuring out where you are when you realize you are not where you expected to be. Stop, orient your map, look for landmarks, and find your position.
See the Glossary for all curriculum terms.
Related Activities
Relay Race (extension)
Teams of 3-4 each run a short point-to-point course in sequence, tagging the next runner when they finish. Adds time pressure and teamwork on top of the same navigation skills as Point-to-Point. Takes 20-40 minutes with several short courses of equal length; a wrong code sends the runner back to fix it, and accuracy still wins over raw speed.
Memory-O (variation)
Students navigate from memory instead of carrying the map: either memorizing a short course upfront, or finding one checkpoint at a time from map snippets posted along the way. Builds spatial memory and rewards careful map study before moving. Takes 15-30 minutes; students who lose the thread return to the last map they saw.
See Electronic Timing for setup instructions.