
Animal-O — Activity (Clue Sheet Orienteering)
Use a clue sheet to find checkpoints in order
| Time | 15-30 minutes |
|---|---|
| Space | Gym, schoolyard, or local park |
| Materials | Animal-picture checkpoints, Clue sheets, Cones to hold the animal pictures (optional) |
| Vocabulary | Clue sheet, Checkpoint, Course, Boundary, Spatial memory |
"In orienteering, you find checkpoints in order using clue sheets"
- Learning Goals
- How to Run It
- Reflection
- Script
- Vocabulary
- Related Activities
Learning Goals
Students completing this activity will be able to:
- Use a clue sheet to complete an orienteering course in order
- Check the animal picture at each checkpoint to confirm they have the right one
- Develop spatial memory by repeating courses and tracking where checkpoints are
- Manage quick changes of direction while moving through the space
See the Grade 3-5 curriculum for how this activity fits into the lesson sequence.
How to Run It
Setup
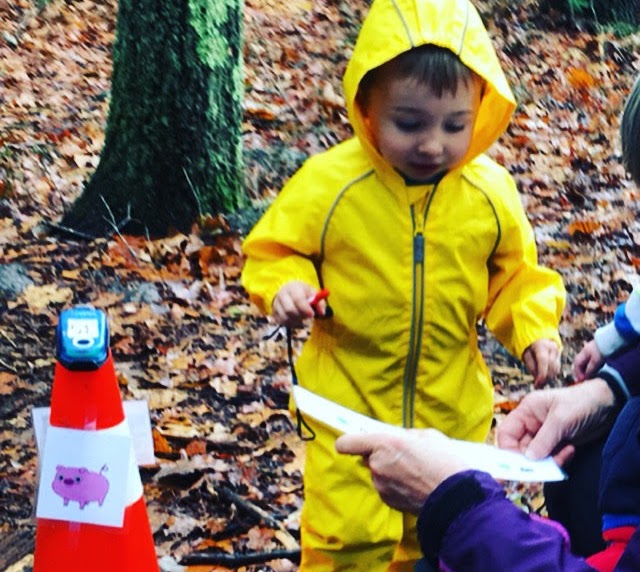
- Place animal-picture checkpoints around the play area, spread out within the boundary
- Set up a start/finish area with a marker or cone
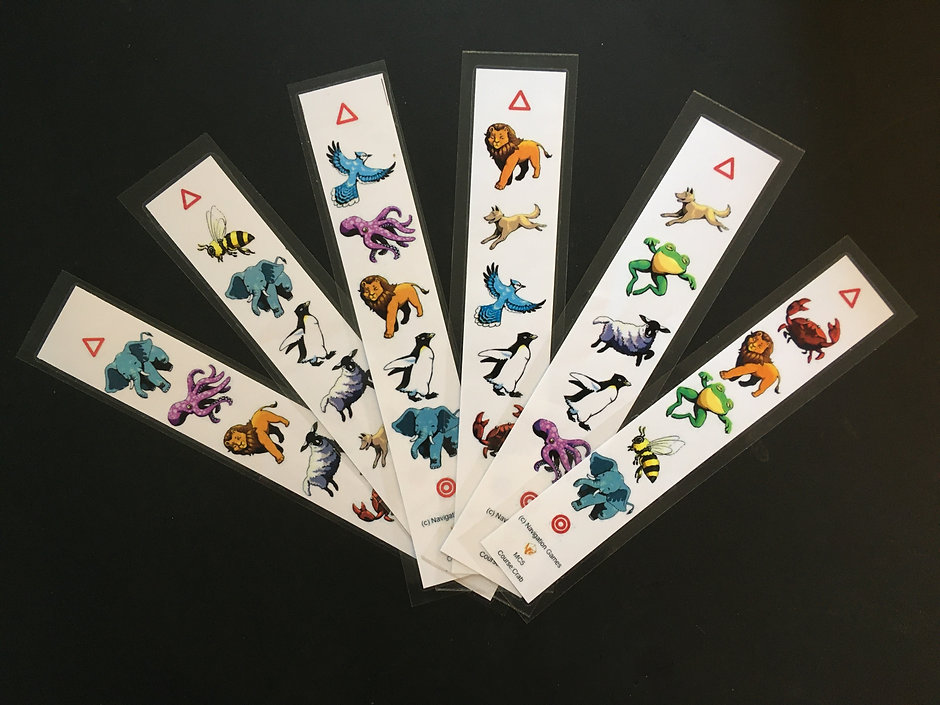
- Prepare clue sheets. The Navigation Games teaching kit includes six 5-animal clue sheets (each a different course) and 10-animal clue sheets for a challenge
- Optional: set up a whiteboard near start/finish to track times or completions
Steps
- Each student or pair picks up a clue sheet at the start
- Find the first animal on the clue sheet. Run to that checkpoint and confirm the animal matches
- Continue to the next animal on the sheet, visiting each checkpoint in order
- Return to the finish after the last checkpoint
Adaptations
Ways to adapt the activity to meet the needs of your students: slow things down, increase the challenge, or adapt for different learners
- For speed: repeat the same course and beat your previous time
- From memory: put the clue sheet away and try to complete the course
- Different sheet: try a new 5-animal sequence. There are six different 5-animal courses in the kit
- New locations: move the checkpoints to new spots and start over, so a memorized route stops helping
- 10-animal clue sheet: for pairs who finish all six 5-animal courses
- Solo: if students started in pairs, try it individually
- Track times: log course completions or times on a whiteboard for friendly competition and a sense of progress
- Animal Relay: in small teams, students take turns running to a named animal checkpoint and back. The caller says an animal name; the runner finds it and returns. Tests spatial memory and adds competitive energy. Good as a closer after students have learned the checkpoint locations.
- Draw and guess: as an optional deeper add-on after the courses, each student draws the space and circles the location of one animal (without naming it). A partner reads the drawing and guesses which animal it is. Can a fellow student read your map well enough to know? A first taste of map making and map reading.
Tips
- Make sure students check the animal at each checkpoint, not just run to the nearest cone
- If students are struggling, start with Explore & Find (see Related Activities tab)
- Moving checkpoints to new locations resets the challenge and prevents memorizing a route
Reflection
- What do you like most about orienteering so far?
- How did the clue sheet help you know what order to visit checkpoints?
- Why do you check the animal at each checkpoint instead of just running to the nearest cone?
- What was the hardest part of this activity? Why?
- How did you remember where the animals are?
- What helped you move quickly and safely as you changed direction between checkpoints?
- How did you work together? What strategies did you use to be successful as a team?
Script
Visiting Cones Together
"Now we're playing Animal-O. First we'll visit the animal cones together as a group."
(Walk to first cone) "Which animal is this? How does it move?"
"When we find an animal, we move like that animal to get to the next one. Let's go."
Clue Sheets
"Now you each get a clue sheet. What do you see on it, words or pictures?" (Students: "Pictures!")
"Your goal is to find all the animals in order, top to bottom. When you find an animal, check that the picture on the cone matches your clue sheet. Then move to the next one."
(Hold up clue sheet and point to the first animal)
"Start here at the start cone. Look at your first animal. When you find it, check it matches, then move to the next one on your sheet."
Vocabulary
Clue sheet: A list showing the order to visit checkpoints. In Animal-O, the clue sheet shows animal pictures.
Checkpoint: A location marked with a cone or flag. In Animal-O, each checkpoint has an animal picture attached.
Course: A sequence of checkpoints from start to finish.
Boundary: The perimeter of the play area. All checkpoints are inside the boundary.
Spatial memory: The ability to remember where things are in space.
See the Glossary for all curriculum terms.
Related Activities
Before This Activity
- Boundary Run: participants should know the boundary before playing Animal-O
- Explore & Find (readiness): a less structured warm-up where pairs explore to find animal checkpoints without a set order or clue sheet. Use it if students need to get familiar with the space and checkpoint format first
Leads To
- Geometric-O: the next step, reading a simple pattern map instead of following a clue sheet
See Electronic Timing for setup instructions.
Videos
Overview for teachers
How to play, for participants
Electronic timing and EasyGec with Animal-O