Symbol-O — Activity (Map Symbol Orienteering)
Understand map symbols and the features they represent
| Time | 30-60 minutes |
|---|---|
| Space | Gym, schoolyard, or local park |
| Materials | Checkpoints (with animal pictures), Large-scale orienteering map or picture map, Map key (legend) poster or handout, All-checkpoints map or list of symbols corresponding to the animals, Symbol-O clue sheets |
| Vocabulary | Symbol, Feature, Legend |
"Today we will learn about orienteering maps and symbols"
- Learning Goals
- How to Run It
- Reflection
- Script
- Vocabulary
- Related Activities
Learning Goals
Students completing this activity will be able to:
- Recognize common orienteering map symbols and name the features they represent
- Match symbols on the map to features on the ground
- Use a symbol clue sheet to find checkpoints in order (similar to Animal-O, but with symbols instead of animal pictures)
- Self-check using the animal pictures at each checkpoint
- Plan the order of features before starting
This activity works best after students have completed Geometric-O and are ready to transition from simple pattern maps to orienteering maps with real symbols. See the Grade 3-5 curriculum for how this activity fits into the lesson sequence.
How to Run It
Setup
- Place checkpoints (with animal pictures) at features that match the symbols in the answer key. For example, place one checkpoint on a fence, one by a tree, one near a bench
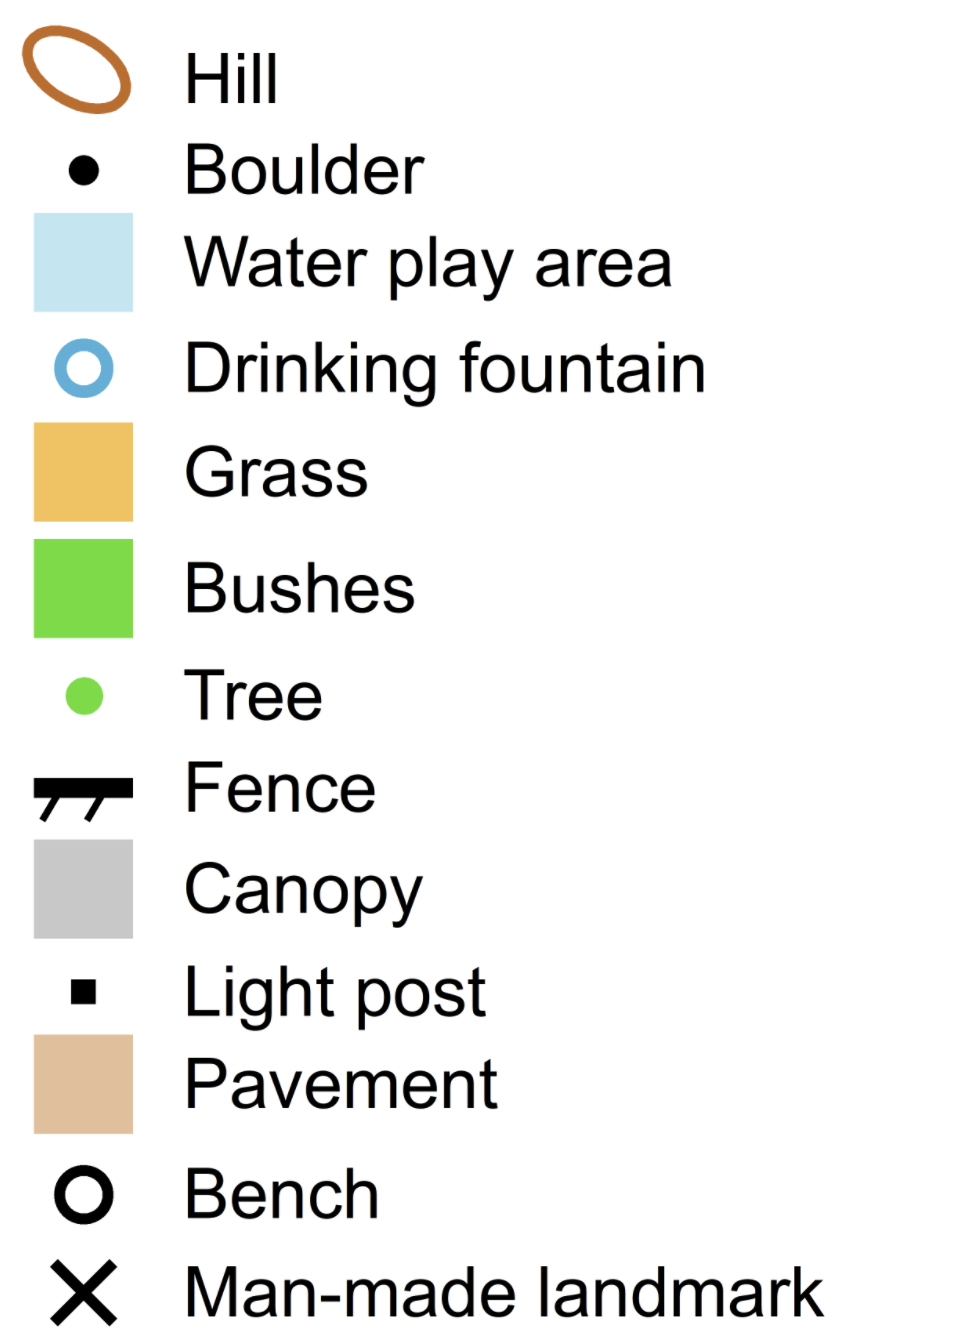
- Prepare a map key poster showing the symbols used at your site
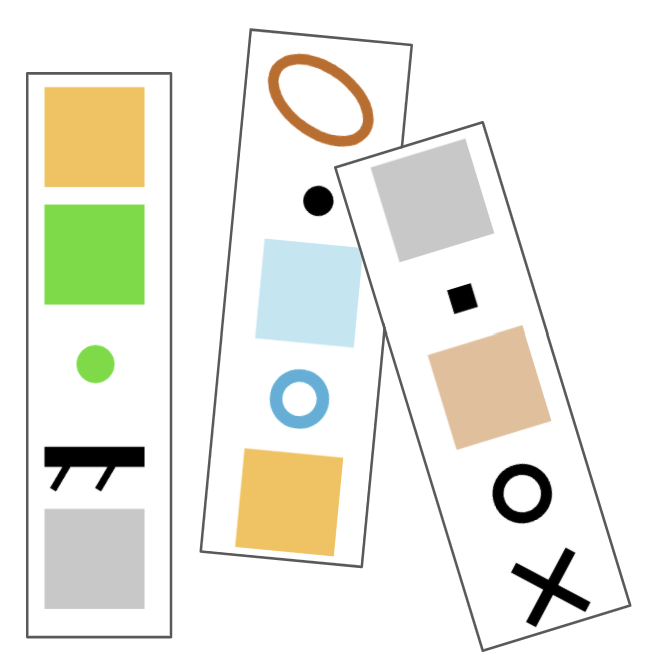
- Prepare Symbol-O clue sheets: strips of symbols (no text) that students must match to features in order, similar to Animal-O clue sheets but with map symbols instead of animal pictures
- Have an all-checkpoints map or answer key listing which animal is at which feature
Steps
- Run the boundary, discuss inside/outside
- Explore to find checkpoints, remembering where a few of them are. Gather on the signal
- Compare the orienteering map to any picture maps or pattern maps used before. Orient the map. Point out features and have volunteers run to them and back
- Show the map key. If possible, hide the text labels and have students guess what each symbol represents before revealing it. Quiz students on matching symbols to features and features to symbols
- Point to a symbol on the key and challenge all students to find the checkpoint at that type of feature. Then pass out symbol clue sheets. Students work individually or in pairs, visiting features in the order the symbols appear on the sheet. They check their answer using the animal picture at each checkpoint
- When students finish, verify they visited all features in the correct order. If they made mistakes, explain where the error was and let them try again. Students may repeat courses as they please
Adaptations
Ways to adapt the activity to meet the needs of your students: slow things down, increase the challenge, or adapt for different learners
- From memory: have students do the course from memory
- Solo: have students do the courses by themselves
- Try Symbol Relay: a competitive team version of learning symbols (see Related Activities tab)
Tips
- A checkpoint at one feature can sometimes be interpreted as another (e.g., a checkpoint at a trail intersection near some trees could be read as "trail intersection" or "vegetation"). Be aware of alternative correct answers
- Have students say the order of features out loud before starting. This confirms they understand the clue sheet
- Start with 3-4 easy symbols (path, building, fence) before adding harder ones (vegetation boundaries, contours)
Reflection
- How are the two maps different?
- Which symbols were easier or harder to remember? Why?
- How did you match a symbol on the map to the real feature it represents?
- How did the clue sheet help you know which order to visit features?
- How did you check you found the right feature at each checkpoint?
- Did you plan your order before starting, or figure it out as you went?
- How did you work together?
Script
Introducing the Symbols
"The challenge in this activity is to learn the map symbols, and use those to find the checkpoints. Start by looking at this map key."
(Hold up the map key.)
"You will receive a sheet of symbols that looks like this, although it won't have the words, and they might be in a different order. You must find checkpoints hidden at features matching these symbols in order from top to bottom."
"Can anyone remind me what a feature is?"
(A real-life object that can be shown on a map.)
Trying It Together
"For example, if you were using the map key here, which checkpoint would you have to find first? This is the symbol for a bench, so you go to the checkpoint at the bench first! Everyone try to find the checkpoint on the bench right now."
(Students run to the bench checkpoint and back.)
"What animal was at the bench? Check your clue sheet. Good. Now look at your second symbol..."
Vocabulary
Symbol: A figure on the map that represents an object in real life. For example, a green circle means a tree, and the color blue means water.
Feature: A real-life object that can be shown as a symbol on a map. Fences, buildings, paths, and trees are all features.
Legend: A key that shows what each symbol on the map means. Also called a map key.
See the Glossary for all curriculum terms.
Related Activities
Symbol Relay (variation)
Team relay to learn map symbols competitively. See the full Symbol Relay activity page.